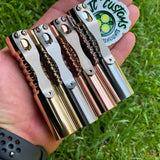
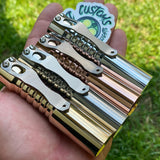
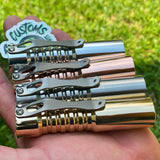
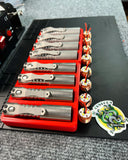
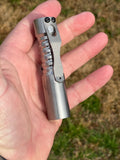
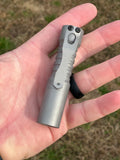
Introducing HYDRA, our 14500 triple led flashlight. When I set out to design a flashlight, I wanted something slim and pocket able with enough power to light up your surroundings without being cumbersome to carry. This is exactly where the HYDRA comes in, small enough to carry everywhere that packs a mighty punch.
Specifications:
Material: Aluminum/ Titanium/ Copper/ Brass
Titanium clip
Runs on a single button top 14500 battery (not included)
Triple Samsung 351 5000k
Frosted triple optic
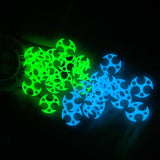
Hyper glow gasket
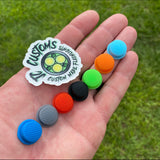
matching switch boot
Driver: Fet +7135 Bistro Firmware
*Hyper glow gaskets are available in blue or green .
Tail switch buttons are available in Blue, Gray, Red , Black, GITD Green, Orange, or GITD blue.
Please note which ones you would like installed at check out.
THESE ARE BUILT TO ORDER. PLEASE ALLOW 2 WEEKS FOR SHIPPING
"Bistro" Firmware
=================
While off:
- Fully click and release to turn the light on. It will go to the
first mode or the last-used mode, depending on whether you enabled
mode memory.
While on:
- Short tap: Do a short (less than 0.5s) half-press to go forward to
the next mode.
- Med tap: Do a medium (0.5s to 1.5s) half-press to go backward to
the previous mode, if medium-press is enabled.
- Long tap: Do a long (longer than 1.5s) half-press to reset to the
first mode (if mode memory is turned off).
- Or fully click and release to turn the light off.
- Short tap a bunch of times (15+ taps, or until the light stops
turning on) to enter config mode.
Hidden modes:
- Go backward from moon to access the hidden modes. They are, in
order:
- Turbo (just like the regular turbo)
- Tactical / police strobe (7 Hz / 14 Hz alternating)
- Battery check / beacon mode
It should blink out the voltage in whole numbers then a '.' then
tenths. So, for 3.6V it would blink out "--- . ------".
Voltage range is from about 2.5V to 4.4V
- Biking flasher (2-level stutter beacon, 1 Hz)
Configuration options:
-The config mode has several options. It will blink out a number to
show which option is active, then "buzz" or "stutter" for a bit.
Click during the "buzz" to select that option. Some options may
enter a secondary config mode after the light turns back on.
Options include:
1. Muggle mode / simple mode. Good while lending the light to
others. It overrides other config settings temporarily:
- low/med/high, in that order, with high at about half power.
- no moon, no memory, no medium-presses, no hidden modes
- the only config option is the option to exit muggle mode
2. Mode memory. Off or on.
3. Moon. Select to turn moon mode on or off. This is in addition
to the other regular modes, so you get 2 to 9 levels when moon
is enabled.
4. Mode order. Low to high, or high to low.
5. Mode group. Choice of 1 to 6 regular modes from low to turbo,
or one of 3 special groups. After clicking, the light should
come on in a special group-select mode. In this mode, it
slowly blinks 9 times, pauses, then repeats. Turn the light
off after N blinks to select mode group N.
The mode groups are:
1. 1300 lm only
2. 8, 1300 lm
3. 8, 235, 1300
4. 8, 104, 506, 1300
5. 8, 75, 254, 642, 1300
6. 8, 50, 167, 366, 757, 1300
7. 140, 1300, strobe
(police modes)
8. bike flasher, battcheck, 8, 140, 1300
(biking modes)
9. 4, 36, 140, 500, 1300
(like group 5 but lower)
Example: To select group 3 (low-med-high), let it blink three
times then click the button.
Note: (output is for example only and depends on led option)
6. Medium-press. Off or on. If on, a medium-press will allow
going backward through the mode sequence, and hidden blinky
modes will be accessible.
7. Thermal calibration. Set the temperature at which the light
will begin stepping down to cool itself off. After clicking to
select this, the light should turn on in a special thermal
calibration mode. It will start at a medium-low brightness,
wait a second or two, then step up to turbo.
- To turn off thermal regulation, click within the first second
(while the output is relatively low).
- To set a new maximum temperature, leave the light on until
you think it is too hot, then turn it off. From this point
on, the light will use that new temperature as its maximum
allowed heat.
Note that there may be a delay between when you feel the heat
and when the MCU feels the heat, so the value saved may be a
little bit lower than expected.
8. Factory reset. Change all settings back to default.


